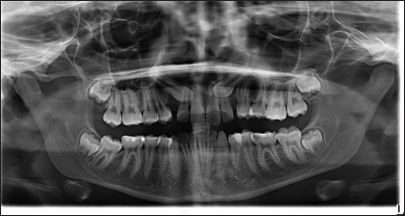
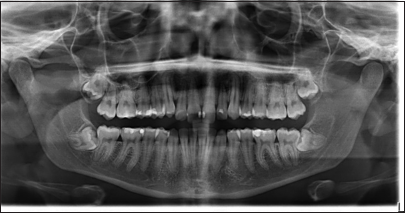
The use of temporary anchorage devices (TADs) for the treatment of impacted canines represents a fundamental advantage to creating a reliable and stable anchorage unit for the de-impaction stage.[1] Nowadays, a fundamental difference in the use of TADs should be made to have the proper orientation and choice between TADs surgically guided and inserted with devices developed by an orthodontic laboratory and TADs placed manually without a specific device built on but with only the purpose of creating an immediate anchorage support.[2] When approaching impacted canines with aligners, the use of TADs becomes mandatory to avoid stressing patient compliance in the use of elastics, to have a more reliable anchorage system, and, in particular, to avoid any side effects on teeth. Following this concept, the orthodontic treatment will be divided into three steps:
Space opening for canines by means of aligners
De-impaction stage on TADs by means of sectional wires connected to miniscrews (Spider Pin 1.3 × 10 mm)
Space keeping with passive aligners
Torque correction and finishing with active additional aligners.
The author’s approach focuses on simple and smart mechanics creating a reliable anchorage system, which, during the years, became a protocol called TADs Smart Easy Bending. In this clinical scenario, the first part of the treatment is based on aligner space opening by means of distalization and anterior proclination when possible [Figures 1-3]. After this, two TADs are inserted buccally between the first molars and second premolars and between the second premolars and first premolars. A 0.017 × 0.025 titanium molybdenum archwire (TMA) wire is then modeled properly to fit the miniscrews surrounding the TADs and create a loop activated with a vertical and buccal force vector in the proximity of the space of the canine position without any side effects on teeth [Figure 4].[3] The cantilever has been connected with the button bonded on the canines by means of a metallic ligature. The cantilever has been re-activated just removing the metallic ligature and activating the extrusion/ buccal vector by using the plier in the loop [Figures 5 and 6].

Export to PPT

Export to PPT

Export to PPT

Export to PPT

Export to PPT

Export to PPT
CONCLUSIONThe full eruption was achieved in 7 months. For all the forced eruptions stages, the patient was wearing the aligners properly cut to allow the plastic to fit the extremity of the cantilever close to the canine. On the left side, one TAD failed when the left canine erupted; for this reason, to fulfill the full eruption, a different cantilever has been modeled with a hybrid anchorage: The sectional was surrounded by TAD while one extremity was bonded on the second premolar and the other extremity was connected to the canine after a loop activated in extrusion.
Only at this point, the further aligner stage can be planned for finishing. The final position of the maxillary canines on the panoramic X-ray shows a good periodontal condition and proper axial inclination.
留言 (0)